Last February (and i mean 2011 February... yes, looong time ago) after my birthday i decided that I will finish proyects instead of only starting them. This has two consequences:
a) Someone hear me and laugh to death.
b) I forbid myself to buy new stuff for my "great idea i just have today in the bath".
Actually, i was pretty sure i will still start some proyects because... well... it´s how i am. But i´m proud to say that i only started one, and it´s only a long-time proyect that doesn´t need too much attention (and doesn´t need too much space): my golden demon proyect of wich i talked about on another post. Meanwhile, i decided that buying stuff to "complete" already started proyects or just to decorate stuff i already have would be allowed: and all of this leads me to this post: an evaluation of GW movement trays.
Ok, pretty unrelated beginning for this kind of post, but i just have to told :P.
Well, here is the package:
 | |
| The Package |
At this point you can think that GW has reached another level of lazyness: now they say "built yourselve your movement trays". And that´s true, but with a big "but" (no, a butt not, a but):
 |
| Elements |
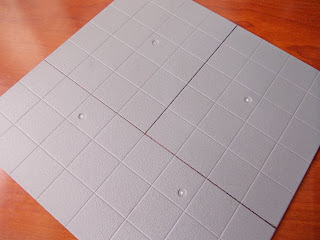
The pack comes with two plastic panels with squares marked. One of the sides have 20 mm squares and the other 25 mm, wich covers all the range of sizes for Warhammer´s bases (because monsters and similars are nothing but a "combination" of several 20-25 mm bases).
 |
| Close up of the two kind of square´s sizes |
Ok, so let´s built our own movement tray: First: mark the size you need (that is, the number of minis on your unit). In this example, two 20-men Chaos warriors (25 mm)
 |
| Do not throw away anything! |
Now, cut:
 |
| I use that saw in the picture for nearly all my hobby´s cutting |
BEWARE!: You will have to cut a little more that only "by the line" if you want your base to "hold" your miniatures like the old bases: It´s hard to explain now, wait for the second post of the series and you will see pictures, i´m only giving you a warning now ;)
After that, remove from the sprue four "corners":
 |
| This is how they look like :P |
I suggest to glue these first. Put all in "position" on the table and then glue one by one pressing the base, so they end in the better place possible. Ein? Well, if you do it one by one "in the air" maybe they end in a wrong angle/position/whatever so the final base will be probably unstable. Hard to tell with words (even with pictures) so believe me or not (but if you don´t, don´t tell i didn´t warned you!)
 |
| An example with a mini |
And now we only have to add the borders!.
And that´s all for now: on the second post of the series you will see the final results. Yes, it takes a little more time that the old ones, but now you can have a movement tray for the EXACT size of your unit. If you play with Bretonnia this is a must-have.
See you soon!
 | ||||
| You will need to cut them also (sometimes) |
And that´s all for now: on the second post of the series you will see the final results. Yes, it takes a little more time that the old ones, but now you can have a movement tray for the EXACT size of your unit. If you play with Bretonnia this is a must-have.
See you soon!
No hay comentarios:
Publicar un comentario